Screen recording on iPhone was a bit difficult except you have to utilize the use of third-party apps to enable you to record your iPhone screen. However, thanks to upgrades from Apple, they have enhanced all iOS upgrades and this has made using an iPhone worthwhile.
Currently, you can save YouTube videos without hassle, same as special clips from games you play using your iPhone by recording your iPhone screen. In this article, I’ll be showing you detailed steps on how to screen record your iPhone screen and how to edit the video.
Step-By-Step Guide on How to Screen Record on iPhone
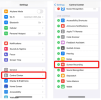
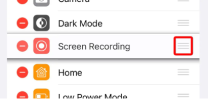
To screen record on your iPhone, go to your Settings and Control Central and click on the green plus (+) sign next to Screen Recording. After that, go to your Control Center and click on the screen recording icon. When you are done recording, next is to select the red bar at the top of your screen to stop recording.- Go to your iPhone Settings app on your iPhone. If you find it difficult to locate this, you can simply swipe down from the middle of your home screen and use the search bar to locate it.
- Next, scroll down and select Contol Center.
- Tap on the green plus (+) icon that is next to Screen Recording; this will move the Screen Recording option up to the bottom of the list under Included Controls.


- Next is to open the Control Center. You can either do this by swiping down from the top-right corner of your screen on an iPhone X or any of the newer models. But if you have an older iPhone, you can open the Control Center by swiping it up from the bottom of your screen.
